Proper aftercare determines 50% of your microblading results. This guide covers the complete healing timeline day by day - from blotting lymph fluid on Day 0 through the ghosting phase and full color return at 6 weeks. Includes what products to use, what to avoid, when you can wear makeup, and how to tell the difference between normal healing and infection.
Microblading aftercare is the single biggest factor that determines whether your client walks away with beautiful, long-lasting brows or faded, patchy results. After manufacturing PMU aftercare products since 2017 and working with thousands of permanent makeup artists across the US and Canada, we have seen the same pattern over and over: the procedure itself accounts for about 50% of the final result, and aftercare accounts for the other 50%.
This guide walks through the entire microblading healing process day by day, from the moment the procedure ends through full healing at 6 weeks. Whether you are a PMU artist building aftercare instructions for your clients or a client who just had microblading done, this is the complete reference.
The procedure accounts for 50% of the final result. Aftercare accounts for the other 50%. Skip the aftercare, and you are gambling with half the outcome.
What Is Microblading Aftercare?
Microblading aftercare is the daily care routine you follow after a permanent makeup brow procedure to support healing, prevent infection, and maximize pigment retention.
The process involves three phases that every client goes through: cleaning the treated area, keeping it moisturized with a thin layer of aftercare product, and protecting the skin from environmental damage during the 4-6 week healing window. Proper aftercare prevents heavy scabbing, reduces pigment loss, and produces smoother, more even color once the brows are fully healed.
Most aftercare protocols follow some version of the AWM method: Absorb, Wash, Moisturize - a framework widely used across the PMU industry. The specifics of how and when to perform each step vary slightly between artists, but the core principles remain the same.
What Should You Do Right After Microblading? (Day 0)
The first few hours after microblading are the most critical for pigment retention. Your skin will produce lymph fluid as part of the natural wound response, and how you handle it sets the tone for the entire healing process.
Blot the Lymph Fluid
Gently blot the brow area with a clean, dry tissue or gauze every 10-15 minutes for the first 2 hours after the procedure. The goal is to remove the clear or slightly yellowish lymph fluid before it dries and forms a thick crust on the surface.
If lymph fluid is left to dry on the brows, it hardens into a thick scab. Thick scabs pull more pigment out of the skin when they eventually fall off, leading to patchy or faded results.
Keep the Area Dry
Do not apply any product, water, or cleanser to the brows on Day 0 unless your artist specifically instructs otherwise. The micro-wounds need to begin the initial clotting process undisturbed.
Day 0 summary: Blot gently. Keep dry. Do not touch the area with your fingers.
Why Is My Microblading So Dark on Days 1-2?
Your microblading will appear 30-50% darker than the final result during the first 48 hours. This is completely normal and happens for two reasons: oxidation of the pigment and the beginning of scab formation.
When pigment is deposited into the skin, it reacts with oxygen in the air and darkens. At the same time, a thin layer of dried blood and lymph fluid sits on the surface, creating a darker appearance. The combination can make the brows look much bolder than expected.
This is the stage where most people panic. The color will soften significantly as healing progresses - this darkness is temporary and expected.
How to Care for Your Brows on Days 1-2
Start the Wash phase of aftercare:
- Morning and evening, gently wash the brow area using a mild, fragrance-free cleanser and your fingertips
- Use light, smooth motions - never scrub
- Rinse thoroughly with lukewarm water (not hot)
- Pat dry with a clean tissue - never use a towel (towels harbor bacteria)
- Apply a rice-grain-sized amount of aftercare ointment using a clean cotton swab
The aftercare layer should be barely visible. More is not better. A heavy layer traps moisture against the wound, which can cause premature pigment loss and increase the risk of infection.
What Happens During the Scabbing Phase? (Days 3-5)
Light scabbing and flaking will begin around Day 3. This is your skin's natural healing response and should not be disrupted.
The brows will feel tight, dry, and possibly itchy as thin scabs form over the microbladed strokes. The color may appear even darker during this phase because the scab layer adds another visual barrier over the pigment.
What Normal Scabbing Looks Like
Normal microblading scabs are thin and light - similar to a mild sunburn peeling. They should not be thick, raised, or oozing.
If scabs are thick and chunky, this usually means one of three things: too much lymph fluid was left to dry on Day 0, aftercare ointment was applied too heavily, or the area was exposed to excessive moisture.
The Critical Rule: Do Not Pick or Scratch
Never pull, pick, or scratch the scabs. This is the most common cause of pigment loss and uneven healing. Each scab is attached to the pigment beneath it. Removing a scab prematurely pulls pigment out of the skin, leaving a gap in the stroke pattern.
Let every scab fall off naturally. If itching is severe, gently pat the area with a clean fingertip instead of scratching.
When Does Microblading Start to Peel? (Days 5-7)
Between Days 5 and 7, the scabs will begin to lift and flake off naturally. This looks similar to skin peeling after a sunburn - small, thin flakes coming away from the surface.
During this stage, you may notice the brows appear uneven as some areas peel before others. One brow might look lighter than the other, or certain strokes might seem to have disappeared entirely. This is temporary and normal.
Continue the wash-and-moisturize routine through this stage. Do not try to speed up the peeling by rubbing or exfoliating.
Why Does My Microblading Look Like It Disappeared? (Days 7-10)
This is the most alarming stage of healing, and it has a name among PMU artists: the ghosting phase.
After the scabs fall off, a layer of new skin grows over the pigment. This fresh skin is slightly opaque, which makes the color underneath appear significantly lighter, grayish, or even invisible in some areas. Many clients believe the pigment is gone entirely.
It is not gone. The pigment is still in the dermis layer. It is simply hidden beneath a layer of regenerating skin. Over the next 2-3 weeks, this new skin will become more transparent as it matures, and the true color will re-emerge.
The ghosting phase is where most clients panic. The pigment is not gone - it is hidden beneath a layer of new skin that has not yet become transparent.
This is the stage where artists receive the most concerned messages from clients. Having a clear aftercare guide that explains the ghosting phase in advance dramatically reduces client anxiety and unnecessary rebooking.
When Will the Microblading Color Come Back? (Days 14-21)
Between weeks 2 and 3, the pigment will gradually reappear as the new skin settles and becomes more transparent.
The color will look softer and lighter than it did on Day 1, which is the intended final result. The strokes will appear more natural, and the harsh boldness of the first few days will be gone.
By Day 21, most clients can see approximately 85-90% of their final color. However, full settling takes up to 6 weeks, so it is important to wait before judging the final outcome.
What Does Fully Healed Microblading Look Like? (Day 30 and Beyond)
At 4-6 weeks post-procedure, the pigment has fully settled into the dermal layer and the skin has completely regenerated. The brows will be their true final color - softer, lighter, and more natural than the initial application.
This is when a touch-up appointment should be scheduled (typically at the 6-8 week mark). The touch-up allows the artist to:
- Fill in any areas where pigment did not retain evenly
- Adjust the color density based on the healed result
- Refine the shape if needed
After the touch-up, the same aftercare process repeats. Most clients need only one touch-up. Annual or bi-annual refresh appointments help maintain the color over time.
Long-term maintenance: Apply SPF daily over the brow area. UV exposure is the number one cause of premature pigment fading. A broad-spectrum sunscreen protects your investment and extends the life of the microblading by months.
Can You Wash Your Face After Microblading?
Yes, but you must avoid direct water pressure on the brow area for the first 10 days after the procedure.
Here is how to shower safely during the healing period:
- Keep showers under 5 minutes to minimize steam exposure
- Wash your body first, then your hair at the end
- Tilt your head back when rinsing shampoo so water runs away from your face
- Do not let the shower stream hit your brows directly
- After showering, gently pat the brow area dry immediately
- Apply your aftercare ointment after the area is fully dry
You can wash the rest of your face normally. Just avoid the brow area with any cleansing products that contain acids, retinol, or exfoliating ingredients for 4 weeks.
When Can You Wear Makeup After Microblading?
Avoid applying any makeup directly on or around the brow area for at least 14 days after the procedure. After 14 days, you can begin using brow products and face makeup near the area.
Why the wait? Makeup products contain pigments, oils, and chemicals that can interfere with the healing wound, introduce bacteria, and cause the microbladed pigment to change color or fade prematurely.
Moist Healing vs. Dry Healing: Which Is Better for Microblading?
Moist healing involves applying a thin layer of aftercare ointment during the healing period. Dry healing means leaving the brows completely alone with no product applied.
Moist healing produces better results for most clients. Here is why:
- Controlled moisture prevents thick scab formation, which means less pigment gets pulled out when scabs shed
- The wound stays cleaner because the daily wash routine removes bacteria and debris
- Skin heals faster in a moist environment - this is backed by decades of wound healing research
- Color retention is more even because the pigment is not torn away by thick, dry scabs
Dry healing is still used by some artists, particularly for shallow machine work or clients with very oily skin. It can produce good results in the right hands with the right technique. However, the wound healing science consistently favors a moist environment - controlled moisture prevents thick scabbing, supports thinner peeling, and reduces the chance of pigment pulling out unevenly. For most microblading clients, a thin layer of a clean, fragrance-free aftercare ointment made with natural ingredients gives the skin what it needs to heal smoothly without interfering with pigment retention.
The key with moist healing is product quantity. The aftercare ointment layer must be barely visible - just enough to create a thin protective barrier. Over-application is as harmful as no application.
More product does not mean better healing. A rice-grain amount is all you need. Over-application traps moisture, breeds bacteria, and pulls pigment out of the skin.
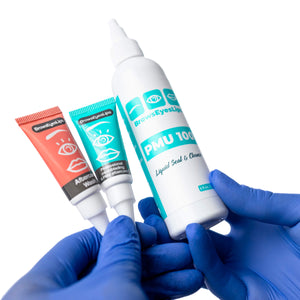
What Products Should You Use for Microblading Aftercare?
The right aftercare products make a measurable difference in healing quality and pigment retention. Here is what to look for:
Cleanser
Use a gentle, fragrance-free, non-foaming cleanser for the daily washing step. Avoid anything containing:
- Salicylic acid
- Glycolic acid
- Retinol
- Alcohol
- Exfoliating beads or particles
A dedicated PMU aftercare cleanser formulated specifically for tattooed skin is ideal because it is pH-balanced for healing wounds and free of ingredients that can degrade pigment.
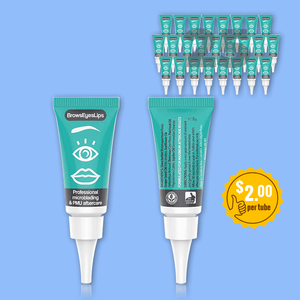
Aftercare Ointment or Balm
The moisturizing step requires a product that:
- Creates a breathable barrier (not an occlusive seal)
- Does not clog pores
- Is free of petroleum and parabens
- Contains ingredients that support skin repair without interfering with pigment
A purpose-built microblading aftercare balm is designed specifically for this use case - clean ingredients, no fragrance, no petroleum, and formulated to create a breathable barrier that supports pigment retention.
What to Avoid
- Neosporin and antibiotic ointments - these can cause allergic reactions and actually pull pigment from the skin
- Coconut oil - too heavy, clogs pores, and is not sterile
- Vaseline/petroleum jelly - creates an airtight seal that traps bacteria
- Vitamin E oil (topical) - can interfere with wound healing in the early stages
What Are the Signs of a Microblading Infection?
Mild redness, slight swelling, and tenderness for the first 2-3 days are normal. Anything beyond that timeline or beyond mild intensity warrants attention.
Contact your artist or a doctor if you see:
- Increasing redness that spreads beyond the brow area after Day 3
- Pus or yellow/green discharge (not to be confused with clear lymph fluid on Day 0-1)
- Fever or chills
- Significant swelling that worsens instead of improving
- Hot skin around the treated area
- Red streaking extending outward from the brows
- Severe pain that intensifies rather than fading
Infections after microblading are rare when proper aftercare is followed. The two most common causes are: touching the brows with unwashed hands and using non-sterile products on the healing area.
Microblading Aftercare Do's and Don'ts
Avoid for the first 10 days:
- Heavy exercise and sweating
- Swimming (pools, lakes, ocean)
- Saunas and steam rooms
- Long hot baths
- Direct sun exposure
- Sleeping on your face
Avoid for 4 weeks:
- Facials, chemical peels, microdermabrasion
- Retinol or acid-based skincare near the brows
- Botox or filler near the brow area
- Tanning beds
Frequently Asked Questions
How long does microblading take to heal?
The surface of the skin heals within 10-14 days. Full dermal healing and pigment settling takes 4-6 weeks. You will not see your true final color until approximately 6 weeks post-procedure.
Is it normal for microblading to disappear during healing?
Yes. Between Days 7 and 10, the pigment often appears to vanish as new skin grows over it. This "ghosting phase" is temporary. The color will gradually return over the following 2-3 weeks.
How dark will my microblading be on Day 1?
Expect the brows to appear 30-50% darker than your target color. This is due to pigment oxidation and surface scabbing. The color softens significantly as healing progresses.
Can I exercise after microblading?
Avoid heavy exercise and activities that cause sweating for 10 days. Sweat is salty and acidic, which can push pigment out of the healing wounds and increase infection risk.
What happens if I accidentally get my brows wet?
A brief splash of water will not ruin your results. Gently pat the area dry immediately and apply a thin layer of aftercare ointment. The concern is prolonged water exposure, not a momentary contact.
How many touch-ups will I need?
Most clients need one touch-up at 6-8 weeks after the initial procedure. After that, annual or bi-annual refresh appointments maintain the color. Some clients with oilier skin or faster cell turnover may need touch-ups more frequently.
Does microblading hurt during healing?
The brows may feel tender, tight, and itchy during the first week - particularly during the scabbing phase (Days 3-5). This discomfort is mild and normal. Sharp or intensifying pain is not normal and should be evaluated.
The Bottom Line
Microblading aftercare is not complicated, but it requires consistency. Wash gently, moisturize lightly, protect the area, and let the healing process run its course without interference.
The clients who get the best results are the ones who follow aftercare instructions precisely for the full 4-6 week healing period. No shortcuts, no heavy product application, no picking.
If you are a PMU artist looking for professional-grade aftercare products formulated specifically for microblading and permanent makeup procedures, explore our full aftercare line - trusted by artists across the US and Canada since 2017.